RECOMMENDED
Early Spring (Containers April)
Late Spring (Garden Beds, Containers May & June)
Mid Summer (Fertilizing - August & September)
Fall (Containers - September / October)
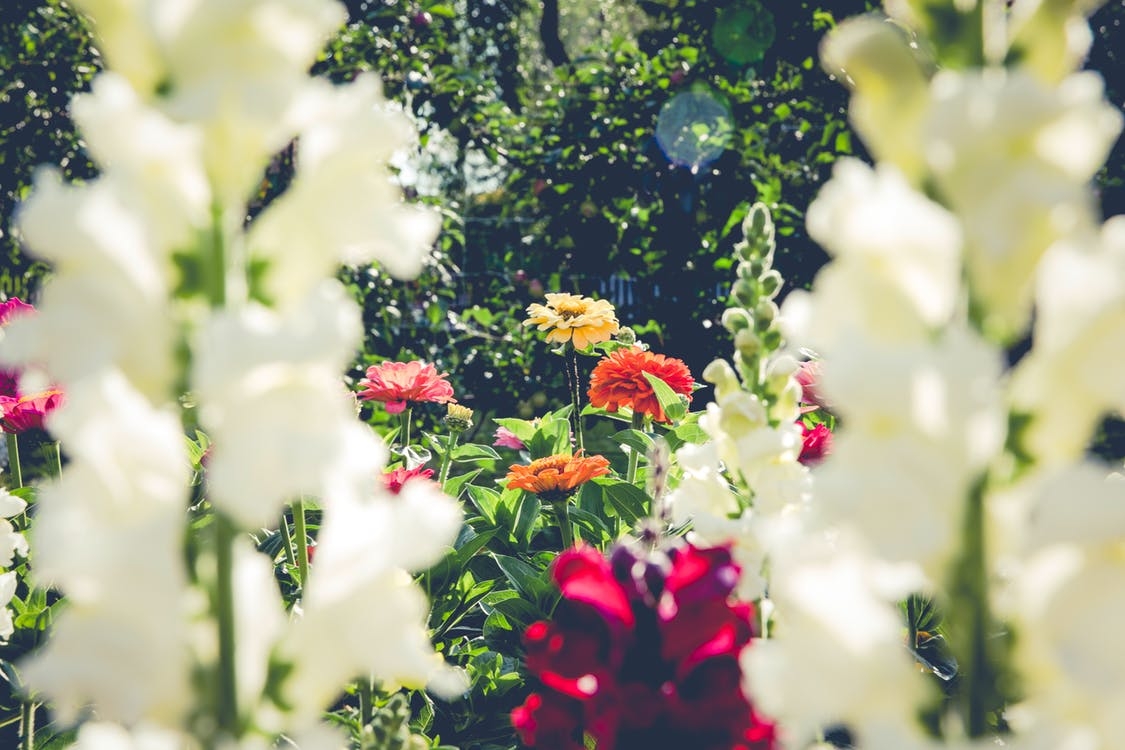
Annual Plantings
Annual plantings provide long lasting seasonal color in your garden. From spring to winter, seasonal containers and bedding plantings enhance your garden with bright spots of color and textures.
Garden Beds An annual garden bed as a feature or adding annuals as an accent will brighten a garden and add color throughout the season
Mulch No annual bed is complete without fresh mulch to give it a clean appearance. Mulch also helps to control weeds and soil moisture while adding nutrients and organic matter
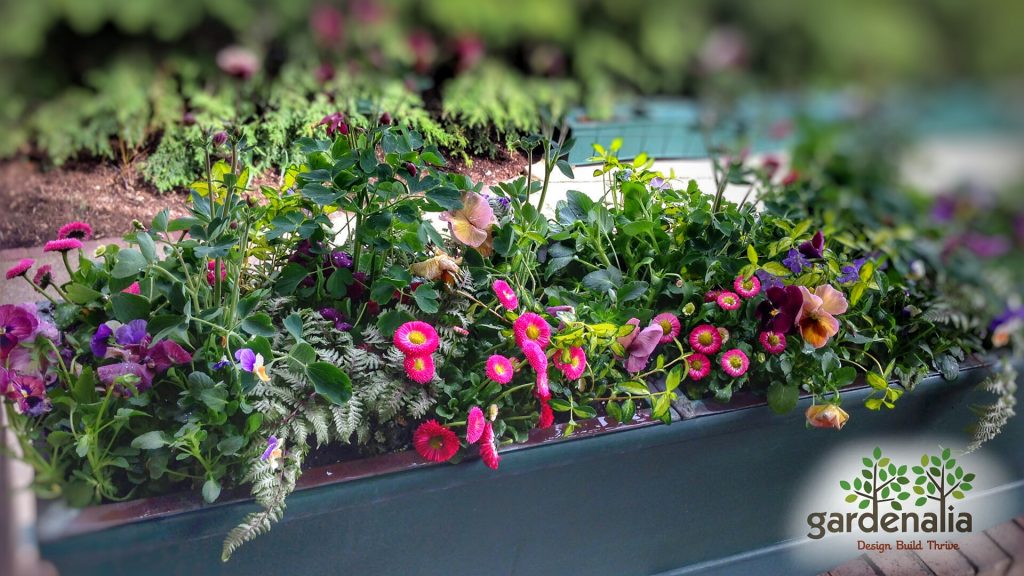
Early Spring & Late Spring Container Planting (April-June) Container plantings are great for adding color and enhancing porches, patios
and entrances. Our early spring container plantings herald into spring with a punch of color after the drab and cold. Great for Easter, Passover and Mothers Day events.
Fall Container Planting: Add fall color and interest to your containers for the fall season including halloween and thanksgiving
Fertilizing Pots and garden bed annuals should be fertilized in August and again in September to improve plant health and continued blooming

Recommended
Fall (September through November)
Bulb Planting Design Our garden designer creates a specific bulb arrangement for your property based on your color and style preferences.
Bulb Planting Planting bulbs will brighten a garden and add color in the spring before other plants start to bloom.
Clean up Adjacent beds with be cleared of debris and refreshed with mulch.
Mulch Mulch helps to control weeds and soil moisture while adding nutrients and organic matter.
Bulb Plantings
Quality Bulbs
We start with high quality bulbs that are plump and firm. We find that bigger is better in the world of bulbs because bigger bulbs tend to have larger blooms.
Picking the right spot to plant your bulbs
Even healthy bulbs can fail if planted in the wrong location. Gardenalia knows that most bulbs do best in full sun (at least 6 hours of direct sun a day) and with well-drained soil. You also want to make sure that you are digging the holes deep enough. (Bulbs should be planted 2-3 times deeper than the bulb is tall: EX: a 3" tall bulb should be planted 6-9" deep.) Once the hole is deep enough, plant the bulb Roots down in the hole.
Timing is everything-
Making sure we have the right bulbs planted at the right time is key to bulb health. Gardenalia can come out and handle all your bulb planting needs
Good Soil & proper Mulch
Well-drained soil rich in organic matter makes for the best planting soil for bulbs. Proper mulching is also key to prevent weeds from stealing nutrients. Spreading 2-3" of mulch over the area makes it difficult for most weeds to break through and flourish but it is no problem for the bulbs. Mulch can also discourage squirrels and other pests from digging up your flowers.
Proper watering
Watering your bulbs after planting helps to encourage them to send out roots and will also help to close any air pockets that could cause the bulbs to dry out.
Planting design & Container gardening
Gardenalia has professional designers that can help you create beautiful natural looking gardens. You can even experiment with container gardens. Most bulbs do just as well in containers as they do in the ground.
Garden Planting Guidelines

Planting perennials
- Dig a hole that is approximately 2 times as wide as the pot and as deep. Fill it with water to thoroughly soak the hole and surrounding soil to determine that drainage is sufficient.
- Inspect the plant to be sure it is healthy with minimal physical damage and the rootball is adequately moistened. Trim off any damaged parts.
Remove the plant from the pot by tipping it upside down and knocking it out of the pot. If the roots are pot bound and encircling the root ball, either tease them away from the root ball or in extreme cases, score the sides by making vertical slice marks in the root ball in 4 places.
Set the plant in the hole and backfill half way. Fill the hole with water. When it drains, backfill and tamp down all around the plant being sure to maintain the original grade of the plant. Water again.
Create a soil moat around the plant to allow minimal water runoff and insure maximum seepage into the root zone.
Planting balled-and-burlapped trees and shrubs
Measure the depth and width of the root ball. Dig a hole that is approximately 2 ½ to 3 times as wide as the root ball and just slightly shallower so that the root flare sits a little higher than the surrounding soil after backfilling.
Fill the hole with water to thoroughly soak the surrounding soil and determine that drainage is sufficient. Inspect the plant to be sure it is healthy with minimal physical damage and ensure that the root ball is adequately moistened.
Set the plant inside the planting hole and backfill half way. B&B plants can be damaged if handled roughly. These plants are usually grown in clay and are therefore heavier than container grown plants. Always support the bottom of the root ball when moving the plant; don't pick the plant up by the trunk or drop it, which might shatter the root ball.
Untie the covering. If it's burlap, it will eventually rot and need not be completely removed; just spread it out to uncover about half the root ball. Trim the excess burlap with scissors and remove. If the covering is a synthetic material, remove it entirely before backfilling being careful not to allow chunk of clay to break off taking roots with them. Continue to fill the hole, firming the soil as you go.
Make a moat of soil to form a watering basin; then water the plant in thoroughly. Inspect the plant to remove any broken twigs and to be sure that it stands straight.
Planting Container grown trees and shrubs
The process for planting container grown plants is similar. The main consideration is that with container grown material the root flare is often buried too deep in the planting medium. After the plant has been removed from the pot, determine where the root flare is by brushing the soil away from the root ball or trunk. And then plant accordingly. Spiraling roots may need to be corrected as with perennials. Otherwise, proceed as above with planting.
Additional Notes:
Compost Soil:
Apply 2” of Agricycle compost to most new and existing garden beds as a soil conditioner, to increase microbial activity and the presence of soil building organisms. Apply the compost to the garden bed before planting so the compost will mix in with the native soil.
Mulching:
Apply 2” of triple/double shredded hardwood bark mulch to newly planted garden beds and those where we perform seasonal maintenance. We pay extra attention to pulling mulch off the crowns of trees and shrubs. Gardenalia does not practice volcano mulching. Mulch helps to control weeds, while maintaining good thermal control in the soil. It also breaks down to become part of the soil giving it good structure.
Transplanting or Moving Trees and Shrubs in the Landscape (Always water First)
Root Pruning
Transplanting established trees and shrubs is somewhat risky because you will damage many of the feeder roots during the transplanting process. Feeder roots are responsible for absorbing the majority of essential nutrients and water. To minimize the shock to the plant, we recommend root pruning several months to one year in advance of the move, depending on the size and type of the plant.
Pruning the roots will encourage the plant to produce a flush of new feeder roots.
The goal is to allow the plant to develop new feeder roots within the zone of the future root ball that will be moved. This will reduce the amount of transplant shock the plant experiences. Before root pruning you should consider the size of the root ball that will be moved. Minimum root ball sizes for specific plant sizes are shown in Table 1. The greater the root ball diameter, the more roots will be included in the move. Also remember that bigger root balls weigh more. Consider how the plant will be lifted and moved. Ball carts, wagons, tarps, or thick folded cardboard can be helpful in transporting the dug plant to its new location.
When to root prune depends on when you wish to move the plant.
For most plants, root pruning is recommended in the fall, followed by transplanting in the spring. This allows the plant to grow new feeder roots in the pruned zone over the winter without the burden of supporting new growth. For larger plants, you may want to root prune one year or more before transplanting. Keep in mind larger plants will need more time to become established after transplanting. Alternatively, rooting pruning in the spring for a fall move is possible; however, the root pruned plant will need to be watered during summer dry spells. Be aware some plants do not respond well to being moved in the fall, especially those with thick and fleshy roots (e.g., Magnolia, tulip poplar, oaks, birch, rhododendrons, hemlocks, and flowering dogwood).
Methods for root pruning
Methods for root pruning vary. One method called spading involves cutting through the existing roots with a spade, making a circular cut all the way around the plant. The edge of this cut should be just inside the edge of the future root ball. Spading works best for small plants or plants that have not been in the old site for a long time.
Another method called trenching involves digging a trench around the plant and refilling the trench where the new feeder roots with develop with soil high in organic matter. Trenching is more appropriate for plants that have been located in the old site for several years or more. Trenching techniques also vary, depending on plant size. Trenching can be done all the way around the plant or only part of the way around the plant, followed by further trenching later in the season. To root prune using trenching, dig a trench 8 to 12 inches wide or wider, 12 inches deeper or deeper with the outer edge of the trench corresponding to the outer edge of the future root ball. Next, fill the trench with soil high in organic matter, made by mixing two parts topsoil with one part compost. If conditions are good, the plant will grow new feeder roots in the trench of rich soil by transplanting time. These feeder roots will give the tree added ability to withstand transplant shock. Be sure to move as many of these new, young roots as you can when you move the plant. Before digging the root ball for transplanting, check to see if a good net of fibrous roots has developed. If few roots are found in the trench, you should consider postponing the move for another year. In addition, when you do decide to move the plant, digging a root ball larger than originally planned may assure that all of the new roots go with it.
Once the roots are pruned, special care should be taken to assure the root ball receives sufficient moisture, especially in the event of a dry fall or winter season. Check for soil moisture levels by feeling the soil. If the soil is dry two to three inches below the surface, give the tree a good soaking, assuring that the trench area is well watered. A two to three inch layer of mulch over the root ball but not in contact with the trunk or stems of the plant can help hold moisture in the soil and also protect the roots from cold temperatures during the winter.
Transplanting
Prior to moving the plant, prepare and dig the hole for the plant in the new location. Also soak the root ball of the plant before moving so that the soil will remain together during the digging process. Carefully dig the soil away from the root ball, and then wrap the whole ball in untreated natural burlap. Be very careful not to use synthetic burlap because it will not rot away and will eventually restrict the growth of the roots. Lash the burlap together securely to hold the roots firmly in place. You can do this by using a large upholstery needle and untreated natural twine to stitch the burlap tightly around the root ball.
Carefully move the plant using a cart, a rented ball cart, burlap, or cardboard. The goal is to keep the root ball intact. If the soil ball breaks, it will break the roots inside and may lead to the death of the plant. Make sure the plant is set at the same depth in the new hole and fill in around the root ball with topsoil. Mulch lightly with three to four inches of mulch, keeping the mulch off of the trunk or stems of the plant, and be sure to provide adequate water throughout the entire next growing season.

